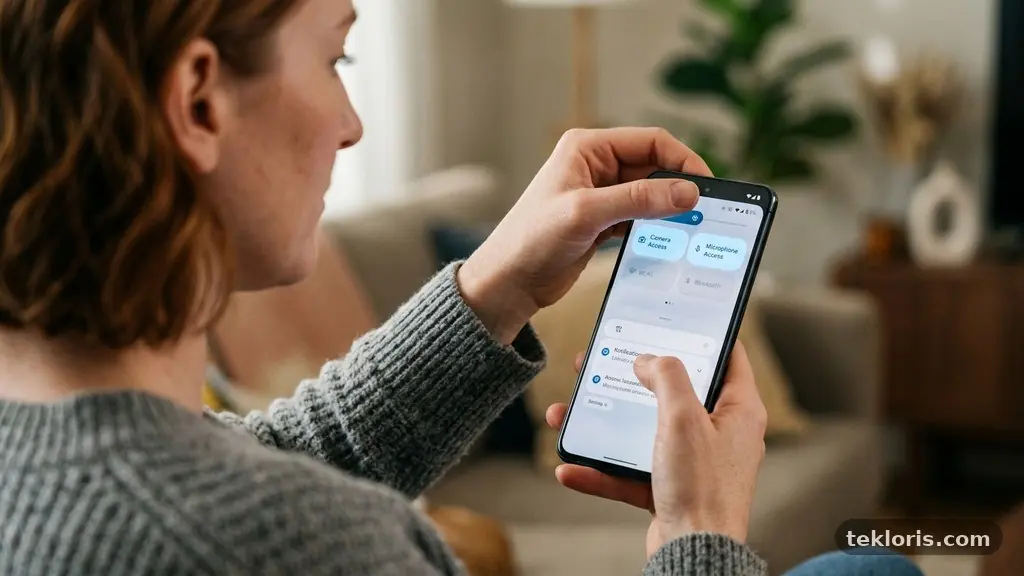
Checking Which Apps Can Access Your Camera and Microphone helps you see which apps can record video, capture sound, or use those sensors in the background. The controls are built into Android, iPhone, Windows, and macOS, although each system places them in a different menu.
A quick review can reveal an old video-chat app, a game with unnecessary access, or a browser permission you no longer need. You’ll also learn how camera and microphone indicators work, how to revoke permissions safely, and what to do when an app stops working after access is removed.
Check Access First: The Fastest Routes
The quickest way to see app access depends on your device. On Android, open Settings, choose Privacy or Security & privacy, then open Permission manager and select Camera or Microphone. On an iPhone, go to Settings, tap Privacy & Security, and choose Camera or Microphone.
Windows users can open Settings, select Privacy & security, then choose Camera or Microphone under App permissions. On a Mac, open System Settings, select Privacy & Security, and review Camera or Microphone in the permissions list.
| Device | Camera access | Microphone access |
|---|---|---|
| Android | Settings > Privacy > Permission manager > Camera | Settings > Privacy > Permission manager > Microphone |
| iPhone | Settings > Privacy & Security > Camera | Settings > Privacy & Security > Microphone |
| Windows | Settings > Privacy & security > Camera | Settings > Privacy & security > Microphone |
| macOS | System Settings > Privacy & Security > Camera | System Settings > Privacy & Security > Microphone |
These menus show permission status, not necessarily proof that an app is using the sensor at this exact moment. An app may have permission but be closed, while another app may be actively using the camera or microphone and trigger a visible indicator.
Start by looking for apps you no longer use, apps whose purpose doesn’t require recording, and programs you don’t recognise. If you find one, turn access off rather than deleting the app immediately; that lets you test whether the permission was needed without losing saved data.
- Review camera permissions separately from microphone permissions.
- Remove access from apps that have no clear reason to record.
- Check browser permissions if websites can use video or audio.
- Look for a camera access indicator or microphone access indicator during use.
- Revisit the list after installing a new calling, meeting, or social app.
Android Permission Manager
Android places camera and microphone controls inside its privacy tools, but the wording can differ slightly between manufacturers and Android versions. On many phones, open Settings, tap Privacy, choose Permission manager, and select Camera or Microphone. Samsung devices and other brands may place the same controls under Security and privacy.
The Camera page normally lists apps under categories such as allowed, not allowed, or allowed only while using the app. Select an app to change its setting. For a social app that only needs video during a live broadcast, “Allow only while using the app” is usually more appropriate than unrestricted access.
Microphone permissions work in the same way, though some apps need sound without displaying video. A voice recorder, podcast app, navigation tool, or accessibility service may have a sensible reason for microphone access, while a simple calculator generally does not.
Use Android’s device-wide controls
Recent Android versions also provide broader switches for camera and microphone access. Swipe down to open Quick Settings and look for Camera access or Microphone access; if those tiles aren’t visible, edit the Quick Settings panel to add them.
Turning off a device-wide sensor switch can stop all apps from using that hardware, even if individual app permissions remain enabled. This is useful during a meeting or when you want a temporary privacy break, but remember to turn the control back on before joining a video call.
Android can show a green indicator when an app uses the camera or microphone. Tapping or expanding the indicator can identify the app or service responsible, which is helpful if the light appears when you aren’t intentionally recording.
Review individual apps
You can also inspect permissions from an app’s information page. Open Settings, tap Apps, select the app, then choose Permissions; the available controls may include Camera and Microphone alongside location, contacts, and photos.
For a more detailed record, some Android versions offer a privacy dashboard showing recent access to sensitive permissions. That history can reveal patterns, such as a meeting app using the microphone during a call or an unfamiliar app requesting access at an unexpected time.
If you revoke access and the app later asks again, read the explanation before accepting. A legitimate camera app should explain why it needs video, and a shopping app should not need continuous microphone access simply to display products.
iPhone and iOS Privacy Controls
On an iPhone, camera permissions and microphone permissions are managed from Settings > Privacy & Security. Tap Camera to see every installed app that has requested video access, then use the switch beside each app to allow or deny it. Choose Microphone in the same section for audio access.
Apple separates these permissions, so an app can use the microphone without being able to use the camera. That distinction matters for services such as voice messaging, where audio is necessary but video is not.
iOS usually asks for permission the first time an app tries to use a protected sensor. Selecting “Don’t Allow” blocks access, while choosing “Allow” gives the app the capability until you change the setting. You can return to Privacy & Security later without reinstalling the app.
Read the iPhone indicators
When an app uses the microphone, iOS displays an orange dot near the top of the screen. A green dot indicates camera use, and it can also appear when the camera and microphone are being used together.
Open Control Center soon after an indicator appears to see information about recent camera or microphone use. The indicator is not an accusation; it tells you that iOS detected access, which may be expected if you just opened FaceTime, recorded a message, or joined a video conference.
If the indicator appears unexpectedly, close apps from the app switcher and check the permission lists. You can also restart the iPhone, update iOS, and investigate the app that was identified rather than assuming the hardware itself is compromised.
Use App Privacy Report
iOS includes an App Privacy Report under Settings > Privacy & Security. After you enable it, the report records app activity involving sensitive data and sensors, including camera and microphone access, over a recent period.
The report may take time to build a useful history, so don’t expect a full record immediately after switching it on. It can still help you compare an app’s stated purpose with its behaviour and identify repeated access that deserves a closer look.
For Apple’s explanation of these controls, consult the official Apple support information about controlling access to hardware features. The exact screen labels can change with iOS updates, but the Privacy & Security area remains the central place to review access.
Windows Camera and Microphone Access
Windows divides privacy controls between device-wide access and individual app permissions. Open Settings, select Privacy & security, and choose Camera. You’ll typically see a switch for camera access, a switch allowing apps to access the camera, and a list of Microsoft Store apps with individual controls.
The Microphone page follows the same structure. Check that microphone access is enabled at the top, then review whether apps are allowed to use it. If the main switch is off, changing a single app’s setting won’t restore access because the broader device permission still blocks it.
Desktop programs require extra attention. Windows may provide a separate option labelled something like “Let desktop apps access your camera” or “Let desktop apps access your microphone,” because traditional programs aren’t always listed individually in the same way as Store apps.
Check browsers and meeting software
Video calls often involve two layers of permission. Windows must allow access, and the browser or meeting program must also be permitted to use the camera and microphone.
If a website cannot hear you, check the browser’s address-bar permission icon and confirm that the correct microphone is selected. A browser may remember a blocked setting for one website while allowing another site to use the same hardware.
Programs such as Teams, Zoom, Discord, Skype, OBS, and recording utilities may also contain their own privacy or audio settings. Windows can approve access while the application selects the wrong camera, disables the microphone, or uses a different input device.
Investigate unexpected use
Windows may show a notification or taskbar indicator when camera access is active, although the exact appearance depends on the device and version. If the camera light turns on unexpectedly, close video applications first and check which program was recently opened.
Review installed programs in Settings > Apps > Installed apps, particularly if the permission list contains software you don’t recognise. An unfamiliar name may belong to a driver, security tool, or manufacturer utility, so search the publisher and installation date before removing it.
On a work computer, an administrator may control certain privacy settings through company policies. If a switch is greyed out or repeatedly changes back, contact the organisation’s IT team instead of attempting to bypass the restriction.
macOS Privacy & Security Settings
On a Mac running a recent version of macOS, open the Apple menu, choose System Settings, and select Privacy & Security. Choose Camera to view apps that have requested video access, or choose Microphone to review audio access.
Click the switch beside an app to permit or block it. macOS may require you to quit and reopen an app before a changed permission takes effect, especially if the program was already running when you changed the setting.
Older macOS versions use System Preferences rather than System Settings, but the relevant controls are still found under Security & Privacy. If you can’t find a menu, use the search field in System Settings and type “camera” or “microphone.”
Understand Mac alerts and indicators
macOS can display a green dot in the menu bar when an app is using the camera. A microphone indicator may also appear in Control Center or the menu bar area, depending on the Mac model and operating system version.
Some Macs include a physical camera indicator light that turns on with camera use. That light is useful because it gives a direct visual signal, but it doesn’t replace permission checks; an app may retain permission even while it is not currently recording.
Microphone activity can be harder to notice because most Macs lack a separate physical microphone light. If you suspect unexpected access, review the Microphone permission list, quit background communication apps, and restart the Mac before testing again.
Don’t overlook system extensions
Audio routing tools, screen recorders, video production software, and conferencing utilities may appear in privacy lists under names you recognise only partially. A virtual camera program, for example, may need camera access to provide its processed video feed to another application.
Removing access can affect professional workflows. If you use a virtual microphone or camera for streaming, note the current settings before changing them, then restore access only to the specific tool you trust.
Apple may ask for an administrator password before changing certain privacy settings. That request is normal for protected controls, but you should still verify the application name and avoid approving access prompts from software you did not intentionally install.
What Permission Prompts and Indicators Really Mean
A permission prompt means an app is requesting the ability to use a sensor; it does not necessarily mean the app is using it continuously. The operating system separates capability from current activity, which is why an app can remain listed as authorised even when it is closed.
Camera access indicators are designed to make active use visible. On iPhone, the green dot is the clearest example; Android commonly uses a green privacy indicator, while Windows and macOS may combine on-screen signals with hardware lights or menu-bar notices.
A microphone access indicator usually appears separately from camera access. If both are active during a video call, you may see signals for both sensors, but the exact presentation depends on the device and operating system release.
Distinguish expected activity from suspicious activity
Opening a camera app, scanning a QR code, recording a voice note, or joining a meeting explains immediate sensor use. Background activity from an app that has no recording feature is more deserving of review, especially if it continues after you close the app.
Permissions can also be triggered by a feature you forgot about. A messaging app may activate the microphone while recording a voice message, and a browser may request camera access for a website-based interview platform.
Look for a pattern rather than reacting to one isolated event. Check the app’s developer, recent updates, purpose, and permission history, then revoke access and observe whether normal operation changes.
Why an app may ask again
An app can request permission again after you deny it, particularly when you open a feature that genuinely depends on the sensor. Some systems may also reset permissions for unused apps or after an operating system update.
If the same prompt appears repeatedly without a clear action from you, update the app and operating system, then contact the developer through a verified support channel. Avoid installing unofficial “privacy cleaners” that promise to fix permissions by demanding broad access themselves.
Revoke Permissions Without Breaking Important Features
Removing access is usually reversible. If a messaging app cannot start a video call after you revoke camera permission, return to the privacy menu, enable access temporarily, complete the call, and disable it again afterward.
For everyday apps, choose the narrowest setting that matches the feature. “Only while using the app” is preferable to unrestricted access when that option exists, and “Ask every time” can be useful for occasional camera or microphone requests.
Before revoking permission from a specialised tool, identify what it does. Accessibility software, dictation utilities, security products, virtual cameras, and professional recording programs may rely on sensor access even if their names don’t immediately explain why.
A practical review routine
Set aside a few minutes every few months to examine app permissions. A review after changing phones, updating an operating system, or installing several new apps is especially useful because old permissions can remain attached to software you no longer remember authorising.
- Open the privacy settings for your device.
- Review camera access and microphone access as separate lists.
- Remove permissions from unused, unfamiliar, or unrelated apps.
- Check recent access history or the app privacy report if available.
- Test essential calling, recording, and accessibility features.
Keep your operating system and apps updated through official sources. Updates often repair permission bugs, improve indicators, and close security weaknesses, though an update may also change where a control appears.
Protect the account behind the device
Camera and microphone permissions are only one part of privacy. Use a strong device passcode, enable automatic updates, protect your Apple or Google account with multifactor authentication, and avoid leaving an unlocked computer unattended.
On a laptop, a physical camera cover can reduce visual exposure, but don’t cover a microphone and assume audio is blocked. A cover also won’t stop an application from recording sound, so microphone permissions and system indicators still matter.
If you suspect malware, disconnect from the internet, preserve useful evidence such as screenshots and timestamps, and run trusted security checks. For serious concerns involving a work device or sensitive recordings, ask a qualified technician or your organisation’s security team for help.
FAQ About Camera and Microphone Permissions
Can an app use my camera if permission is turned off?
Normally, no. Android, iOS, Windows, and macOS are designed to block camera access when the relevant permission is denied, although a browser, virtual camera, or device administrator may involve a separate permission layer.
Why does my microphone indicator appear when I’m not recording?
An open meeting app, voice assistant, browser tab, accessibility feature, or audio utility may be using the microphone. Check the recent-access information and close likely programs, then revoke permission from anything that doesn’t need audio.
Should I deny camera and microphone access to every app?
No. Deny access when an app has no convincing reason to use the sensor, but allow it for features you trust and need, such as video calls, voice messages, dictation, or recording. Limiting access is more practical than disabling every feature indiscriminately.
Does deleting an app remove its permissions?
Removing the app generally removes its ability to use the device, but associated browser permissions, account data, or companion software may remain. Review website permissions and installed desktop components separately, particularly after uninstalling a conferencing or recording tool.
What should I do if a permission switch is unavailable?
The device may be managed by an employer, school, parental-control system, or administrator profile. Check for a management notice in the device settings, update the operating system, and contact the administrator if the control is intentionally restricted.
Make Permission Checks a Simple Habit
Regularly checking Which Apps Can Access Your Camera and Microphone gives you a clear view of what your devices allow, without requiring technical expertise. Start with the permission manager or Privacy & Security settings, compare access with each app’s real purpose, and revoke anything unnecessary.
Pay attention to camera access indicators, microphone access indicators, recent activity reports, and unexpected prompts. A short review after installing new software can prevent forgotten permissions from lingering, while keeping essential calls, recordings, and accessibility tools working smoothly.